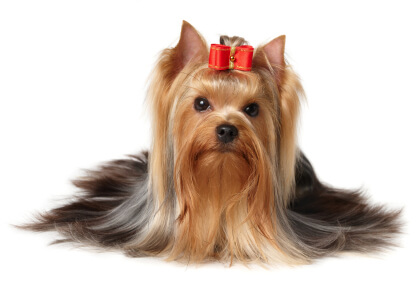

How to do a Puppy Cut – Yorkie Terrier
Here’s an excellent video that shows you how to do a puppy cut on a Yorkie Terrier.
I’ve also had the video transcribed since it is sometimes easier to read certain parts of the instructions.
Here’s the Yorkie Terrier Puppy Cut Video:
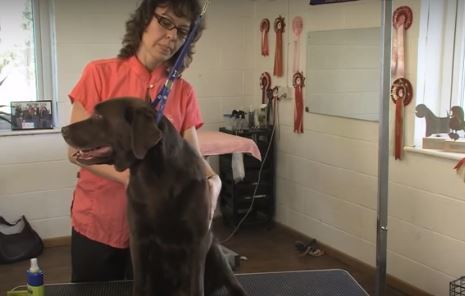
Today, we’re, going to be grooming, a Yorkshire Terrier or a Yorkie. We’re, going to be doing a puppy cut, and so I’m just going to go over the equipment that we’re going to use before we get started.
Dog Grooming Tools Needed:
Of course, gonna use our clippers. We’re, going to use a ten blade and a thirty blade and use the ten blade for the tip of the ears and to do around the private area. Now we’re, going to use the thirty blade to do the pads of the feet and to use under our comb guards.
Here you can use a forty blade instead of a thirty blade, if you’d like and, of course, trying to use our two comb attachments. The lengths that we’re going to use today are a 1 comb and a half comb. Half comes a little bit longer and we’re gonna be using that on her head, we’re gonna use the 1 comb for her body.
We’re. Also gonna have our fine-tooth comb our slicker brush. Our scissors or hew must assert ear puckers in case she has any hair in the ears. Our thinning shears are nature’s, so let’s get started. Today.
The Grooming Process
We’re, going to be grooming Tess. She is a Yorkshire Terrier or a Yorkie. Now. The first thing I’m gonna do is shape the path of her feet and I’m, going to use my 30 blade, but you could also use a 40.
I’m just gonna clear away and then hair that’s on there, Pat’s just so she can get a little bit more traction you don’t have to get it perfectly well, sister. The rest, you can see I kept most of the hair shaved away and then the rest I’ll, be able to scissor, but really you just want to make sure that that hair is gone so that she gets better traction with her past there.
It’s, especially important to keep a hand on the dog at all times, especially when you’re working with a little nervous dog, because they could very easily slip and fall off the table.
Getting a puppy coverage means we’re, not going to leave any skirts. We’re, going to cut all of her body to the same length you can see. I keep going back and forth between fluffing up and going over with my Clippers. That’s going to give us an even clip all over. Just going to repeat that, so it looks nice and even and, again, I always say that the key is really a repetition. The more you go over it, the smoother nicer it’s going to look.
You’re just going to brush up against the grain of the hair and then clip following the curve of her body. We’re going to fluff it up. Here we’re gonna kind of tilt it out a little bit, so it’s, just that hair out, and then we can get our super zero in the next curve.
You can see that the hair isn’t really grown out very much. She gets groomed quite often. So for grooming at home, it’s probably best to do this often, so it’s much easier each time.
Working with Tangled Hair or Matted Hair
Lift it up a little like this, then take this down to cut that off. You’re doing a puppy so make sure you’re holding on to them carefully. Slide the noose off real quick just so we can get a little bit more here.
On my neck up being here, I’m kind of meeting a little bit of resistance. Looks like I might have a couple of matts there. I grab my thinning shears, okay. Yes, I’m. Just gonna use my fingers and feel her where that is and make sure I can feel her skin.
So I’m, not catching her skin, pull that little mat up and I’m. Just gonna take my thinning shears a couple of quick snips to break it up. I grab my fine-tooth comb gently, pull it out much better than using scissors, much safer and much less noticeable.
Okay, as you can see, I stopped here. So we’re gonna hand scissor.
She’s, got pretty thin hair, so she doesn’t have a lot of hair around this area, but I do still like to clean up around the private area and it just keeps everything a little cleaner.
She doesn’t have a lot of hair and I thought to get from this angle really. The idea is just to clear that away so that when she urinates it doesn’t get stuck in her hair. She’s very cute yeah.
I’m gonna grab my scissors. I prefer curved shears. Use straight shears if you like. The curves are much easier to work with and again most of the hair that you’ll be trimming will be in a curved pattern.
Trimming the Paws
The first thing when you do when trimming her feet is to hold her foot up, brush all this hair down. Start by sheering at the back of her foot. Then once that’s done, sheer away all that hair there bottom of her pad.
I’m going to alternate between trimming and putting her foot down so that I can’t just see what it looks like when she’s standing in a position.
I can see where it’s sticking out. I lift it up and do a little more trimming. Being cautious like that, when I’m sure that I don’t trim too much off.
Brush the hair forward here. I’m gonna go over that several times, just to make sure there’s not any hair sticking out. Brush down where the body or stomach is. You can leave a skirt if you’d like. Typically with a puppy, you don’t leave a skirt.
Trimming the Skirt
Take my curved scissors. I’m just gonna check and make sure it’s even come around here’s, some of this hair on our rear end.
Her hair tends to stick up. It just adds to her character, so just make sure that it’s even.
Just gonna trim the tiniest bit right under her tail. Using my curved scissors this way, I’m just gonna take a little snip just right under her tail. The really short puppy cut like this. I’m gonna be careful.
You don’t, make them look ball, but to be even keep your plane that slips the line, your stomach. You can see this like you haven’t turned it all my thinning Cheers. Lastly, first thing: we’re gonna. Do a hair band on and trim the hair away from pad.
We want her looking natural, so she really actually looks like she’s a puppy that hasn’t grown.
Trimming the Yorkshire Terrier Face
Her hair is kind of sticking her eyes. Here you can use a blade, you can shave this out or you can use thinning, shears and just trim it down. Just depends on whether or not you like more softer look or if you want a cleaner look.
So I’m, going to show you with the thinning shears. Let’s take it right in the corner, very gently. Just snip, snip, snip, good girl. Sometimes I’d like to take the thinning shears and just go down their nose just a little bit.
I’m gonna get rid of that extra hair to keep it out of the eyes. Maybe that’s. The next thing I’m gonna do is I’m going to do what we call tipping the ears which is basically shaving. The top third of the ears I’m going to use my template for that. Also I’m just going to brush all the hair out.
I’m gonna alter it or flatten my hand. I’m gonna do the same thing on the hand side of the ear. You just want to make sure you’re laying that your against your hand, because you don’t want to get caught in your clippers.
Actually, in that ear canal, you can use your fingers. You would just take it in a very gentle grip, those little hairs in there.
Removing this hair helps make it less prone to infection. You know trapping moisture in the ear and getting infected. Do the same thing with the other ear. Okay, so you cleaned out the highs tips to the ears, but we haven’t, trimmed the hedges.
Yet so now I’m, going to switch back to it 30 blade. I’m, actually going to go overhead with the one comb so use the half compass. It’s a little bit longer and typically leave the head just a tiny bit longer than the body, but her mom likes her head very short.
So I’m, going to use the same link that I used on her body brush down. I’m just gonna make sure I’m very careful going in a backwards motion. I’m kind of going angles like this to catch the hair and I’m gonna brush board.
Finishing up the Puppy Cut for a Yorkshire Terrier
I’m starting to get a better shape. and then we’re, going to finish up with our scissor trimming. You can see it’s a little uneven there again.
You can leave this a little bit long if you like, like a little bit of bangs. So we’re gonna make sure it’s very cleared away from her eyes down on the sides of her eyes and make sure that it’s even.
You just want to take your time to make sure that you turn the hair for all different angles. Make sure it looks good. You can go over it with the thinning shears to soften it, and you can see now it’s short.
Let’s go on there and then I’m gonna take her ear very gently. Open my fingers and hold it very gently, and I might trim this hair all right.
Then I’m, going to take my scissors and do a very neat close trim along that top third edge right up against the ear leather, very gently. Let her hair go back to its natural position. I’m gonna see what it looks like. Soften it with my thinning shears here.
Use your thinning shears here. So just it’s a little neater again, she gets a short face. You can leave a longer beard.
It just depends on what you think looks good. Her mom makes short around any tears just to shape that really give it a natural look. So it looks you know more, like a puppy.
I like to really take my time and kind of, you know. let them get into their natural position, so I can see anything that’s sticking out. If I could see anything that looks out of place just go over it again.